
Why Do Ceramic Parts Crack During Machining? Causes & Fixes
Why Do Ceramic Parts Crack During Machining? Causes & Fixes
Technical ceramics are hard, wear resistant, and thermally stable, which is exactly why they’re used in demanding applications. It’s also exactly why they’re unforgiving to machine. Unlike metal, ceramic doesn’t deform before it fails. It cracks. And once a micro crack forms during grinding, it can sit invisible until the part is under load in the field, and fails there instead.
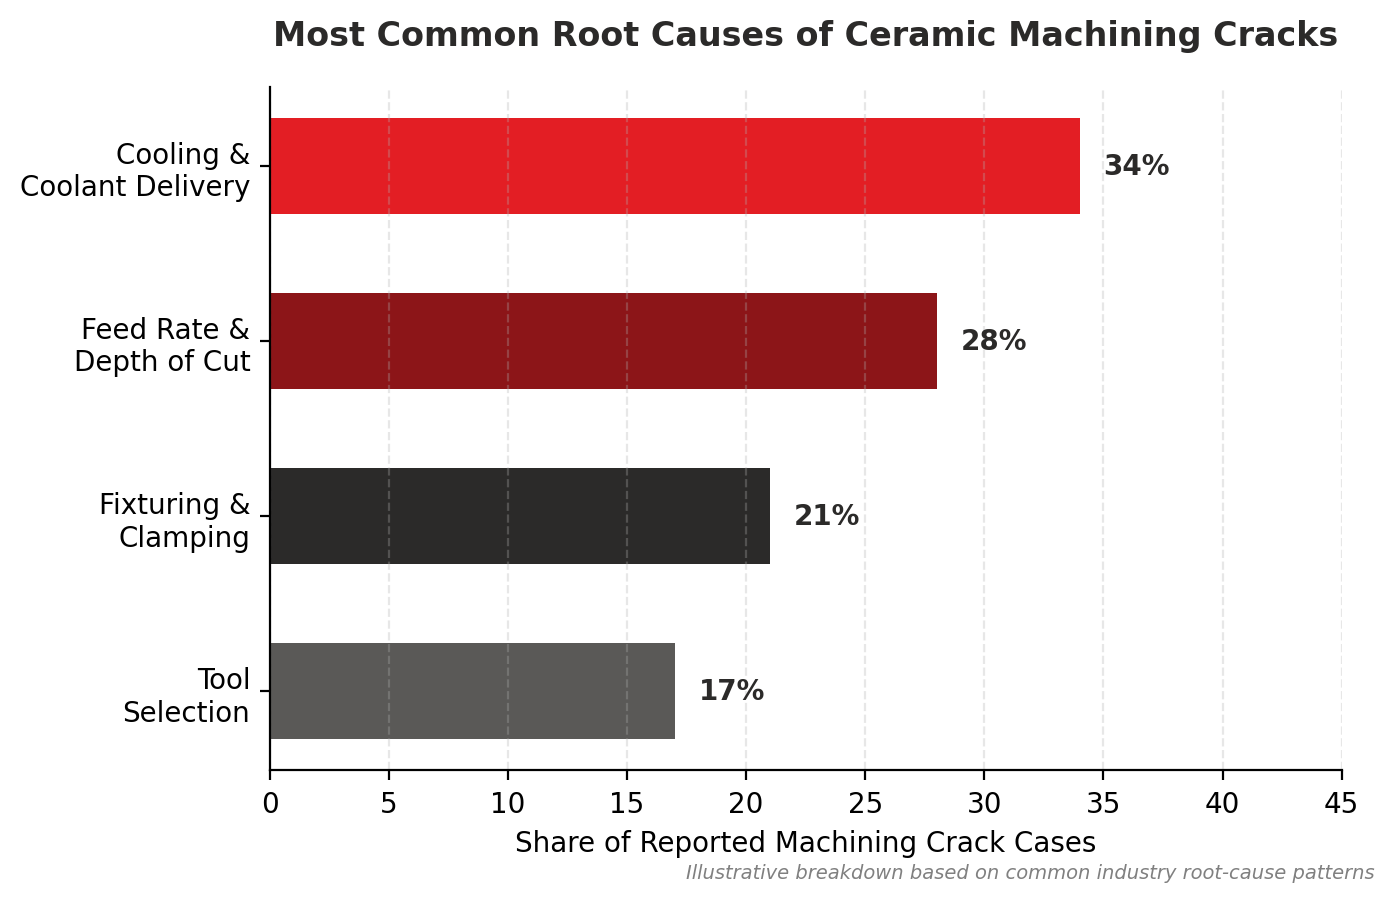
If scrap rates are climbing on a ceramic component run, the cause is almost always one of four things. Here’s how to work through them.
Causes & Fixes
Cooling and Coolant Delivery
This is the most common cause, and the most overlooked. Ceramics are poor thermal conductors in the direction that matters most here, so heat generated at the cutting edge doesn’t dissipate through the part quickly. That heat builds up locally, creates thermal gradients, and thermal gradients create stress. Stress in a brittle material means cracks, and the crack doesn’t always show up until later.
What helps: Consistent, well directed coolant flow right at the cutting zone, not just general flooding of the area.
Feed Rate and Depth of Cut
Ceramics fail through brittle fracture, not plastic deformation. Push the feed rate too aggressively, or take too deep a cut in one pass, and you’re loading more stress into the material than the microstructure can absorb. The result is subsurface cracking that may not even be visible until the part is in service.
What helps: Multiple lighter passes instead of one aggressive one, especially on the finishing pass. Slower feed rates near edges and corners, where stress concentrates and cracks are most likely to start.
Fixturing and Clamping
Over tightened fixtures, uneven clamping pressure, or fixtures that don’t properly support the part during cutting all introduce mechanical stress independent of the cutting process itself. A part can be cut perfectly and still crack because it was clamped unevenly.What helps: Fixtures designed specifically for the part geometry, distributing clamping force evenly rather than concentrating it at a few points. This matters even more for thin walled or asymmetric components.
Tool Selection
Standard carbide tooling wears fast against most technical ceramics and generates more heat and mechanical stress in the process, both of which increase the odds of cracking. Diamond coated or diamond impregnated tooling is standard for a reason: it holds an edge longer and cuts with less force.What helps: Match the tool to the ceramic. Alumina, zirconia, and silicon carbide all machine differently, and grinding wheel grit size matters as much as the abrasive material itself. Too coarse and you get chipping. Too fine and heat builds up.
How to Actually Diagnose the Cause
When cracks appear only on some parts or show up in different locations each time, the problem is usually linked to changing process conditions rather than one obvious defect. The best way to find the root cause is to change only one variable at a time and compare the results. Changing several settings together can make it difficult to know which adjustment actually solved the problem.
Start with the cutting parameters because excessive feed rate can increase mechanical load on the material. Reduce the feed rate slightly while keeping spindle speed, coolant, tooling, and fixturing unchanged. Run a small controlled batch and inspect the parts carefully. If the number of cracked parts decreases, the feed rate is likely
Step What to Check What It Tells You
| Step | What to Check | What It Tells You |
|---|---|---|
| 1 | Reduce feed rate only and run a small batch | If cracking decreases, excessive feed rate may be contributing to the problem. |
| 2 | Check coolant flow directly at the tool contact point | Identifies localized overheating or insufficient cooling even when overall coolant flow appears adequate. |
| 3 | Inspect fixtures for uneven wear, excessive clamping force, or mismatched contact points | Helps rule out mechanical stress caused by improper or inconsistent fixturing. |
| 4 | Check where cracks repeatedly appear on the component | Cracks near edges, corners, holes, or thin sections may indicate unsuitable machining parameters or concentrated stress. |
Conclusion
Cracking during ceramic machining is rarely one dramatic mistake. It’s usually a combination of parameters that are each slightly too aggressive for the specific material and geometry. The fix is almost never “slow everything down across the board.” It’s identifying which specific variable is closest to the material’s limit and adjusting that one first.
If you’re sourcing precision machined ceramic components and want to avoid this trial and error on your own production line, that’s exactly the kind of process control we handle before the part ever reaches you.
D-TECH Technical Ceramics supplies precision machined alumina, zirconia, steatite, and silicon carbide components to tight tolerances for industrial, electrical, and engineering applications.